
This is how I made this...

Into these...

Seriously, isn't she a cutie pie.

 I decided to dye it since the sweater was old and had a few stains. The fabric is Angora and Rayon which makes coloring it very tricky. I had to dye it twice and both times it didn't turn out anything like the color I had planned. I used the dye Idye from Joanne's. The first color I used was a deep blue but it turned more of a soft grey. The second color I used was actually a navy, but that only turned the sweater a soft lavender. I left it in the dye for over six hours the second time, but it still didn't work. Obviously, this was a major lesson on how to dye fabrics. Dying cotton is WAY easier.
 After all of the washes (I never dried it in the dryer) all the agitation made the sweater felt and it shrunk. I was hoping it would, and I was happy with how much it did.
 Once it was dry, I cut some pattern pieces out to make a ruff estimate on what I needed to cut out of the sweater. NOTE- I didn't end up making any mittens :( due to the lack of fabric left over.
 I had to use the sleeves as a panel for the sides of the skirt so it would swing more. I didn't want it to be too tight. So, the mittens had to be sacrificed. I also sewed the buttons down in the front of the skirt so there was no gap or way it could open.
 However, I didn't sew the button closed on the top in order for it to be slipped on and off easier. After I cut out the top, I realized I wanted a little sleeve. I used extra fabric from the sleeve and sewed it along the edge. I didn't have to hem the edge since the fabric was so felted. I liked the raw edge and decided to keep it.
 I then cut the sleeves at a angle to allow some space for the armpits.
 With the panels in the skirt, I had to gather the skirt at the waist.
 Once gathered and even, I turned the top inside out and placed the skirt inside it so it was right sides together. Make sure the buttons were lined up before I started sewing. I folded the bottom up and just made a simple hem.
 I measured the hat size around Clark to see what a baby's head should be like. I then sewed up the side to make a sort of tube. I used the finished edge of the sweater so I wouldn't have to worry about the bottom. I then folded the hat in fourths and sewed each side to the middle.
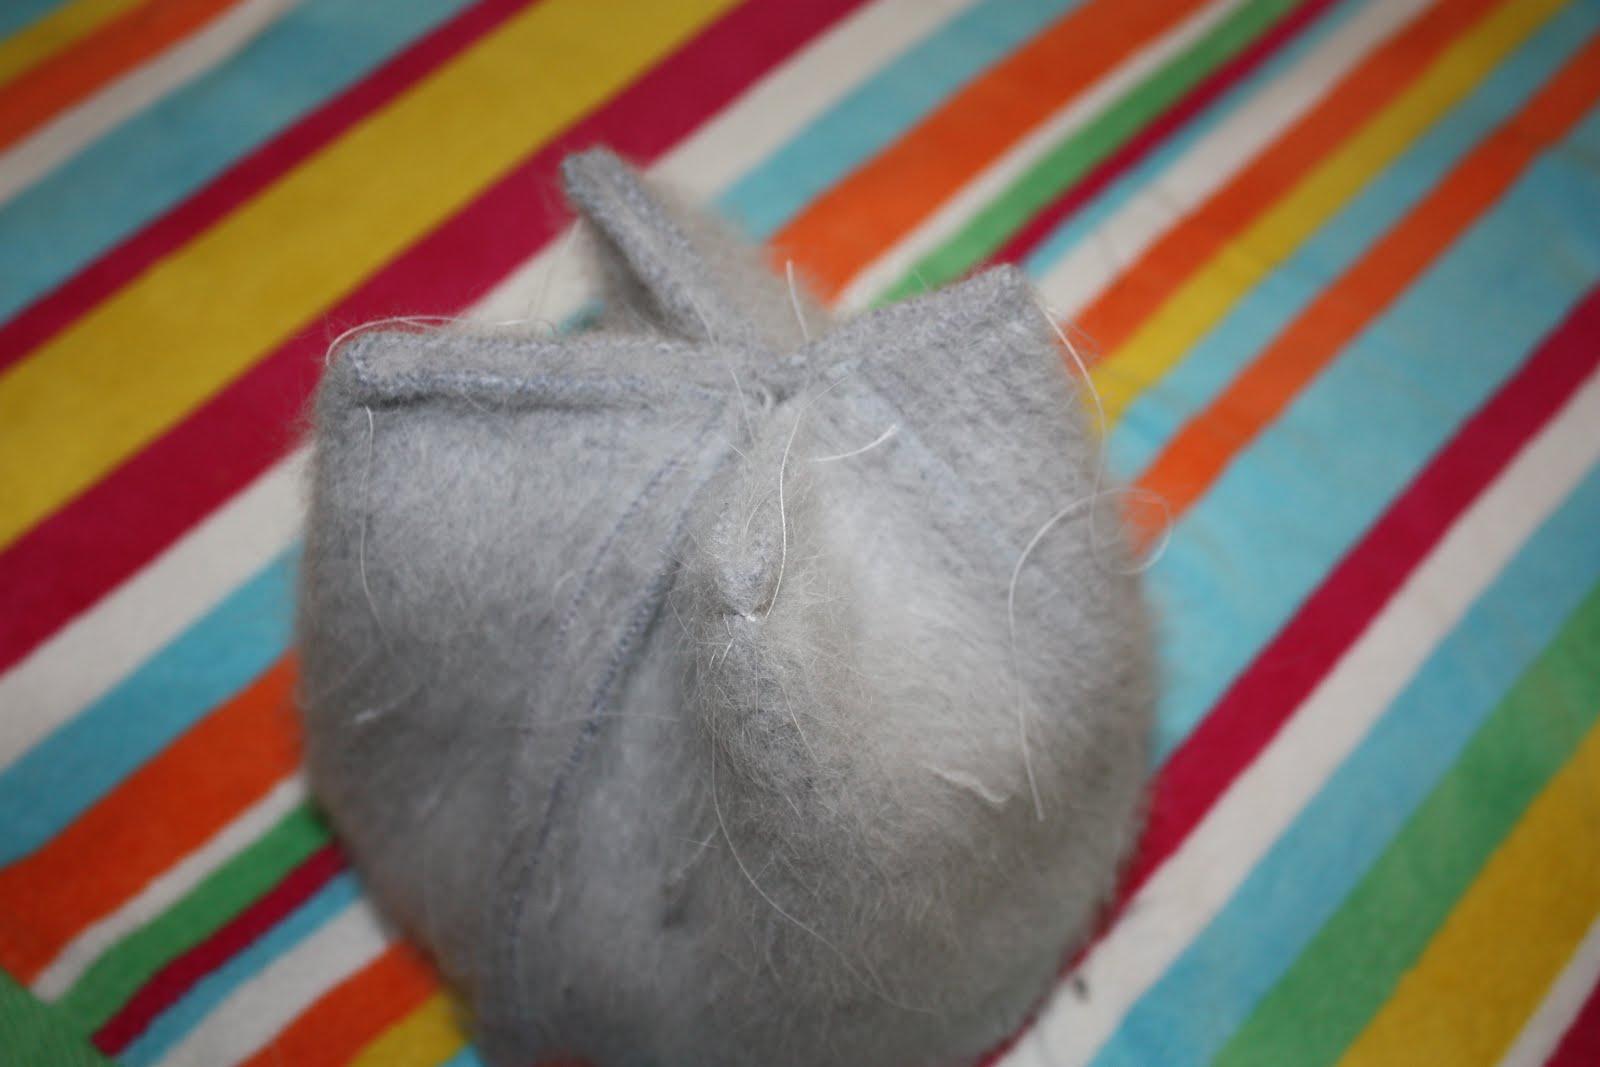 Next, I took each of the little corners and sewed a angle 1.5 inches from the top to the middle. I don't think that makes sense, but I had cut the corners off before I took this picture, so... sorry.
 I turned it back right side in and sewed some extra buttons from the dress to the front. However, you see that we put a flower on it instead. It really pulled out the leggings that my niece wanted to wear. She is such a fashionista that I just went with it.
 This was my first time trying to do a sewing project while I did a tutorial when I don't have a full plan on how I want to do it. I was just fly by the seat of my pants as I was working on this. I think that can make the best projects. Just use all of your sewing knowledge and go for it. What do you have to lose?
Thank you all so much for you amazing support. Don't forget to vote for this project over at Mommy by Day, Crafter by Night.
3 comments:
I voted for you because your project ROCKED!
And by the way, who are you??? You're a freaking talented sewer!
I am soo impressed by this!! Why can't we live closer so I could learn from your sewing projects! You are amazing. I am too late to vote for you :( but I would have because I want this dress so bad for my girls! Way to go Mallory, you're amazing.
I'm so sad the iDye didn't work out for you! Did you use vinegar?
Post a Comment